At a Glance
Your computer has just crashed and it won’t come back up again. Pop quiz, hotshot, what do you do? If you haven’t planned ahead, you’ll be required to start over from scratch. But, if you’ve planned ahead, you’ll reach for your Windows, macOS, or Linux rescue USB stick, along with your backup drive, and begin the recovery process.
In this article, We’ll walk you through creating rescue sticks for the top three desktop operating systems. We’ll discuss how to download what you need, what type of USB stick you’ll need, and what other utilities you’ll need. We’ll also discuss how important it is to backup your hard drive on a regular basis.
How to Create a USB Recovery Drive For Windows 10
Before starting, you’ll need a USB stick that is 32GB or larger. Also, you won’t be able to use the USB stick for any other purpose, no matter how much “empty” space you may see left on the USB stick.
While you could create a bootable Windows 10 stick using a smaller USB stick, it will not include your system files and will only be able to restore your PC to its default configuration. This is why I strongly suggest you use a 32GB or larger USB stick.
To create your Windows 10 USB recovery stick, do the following:
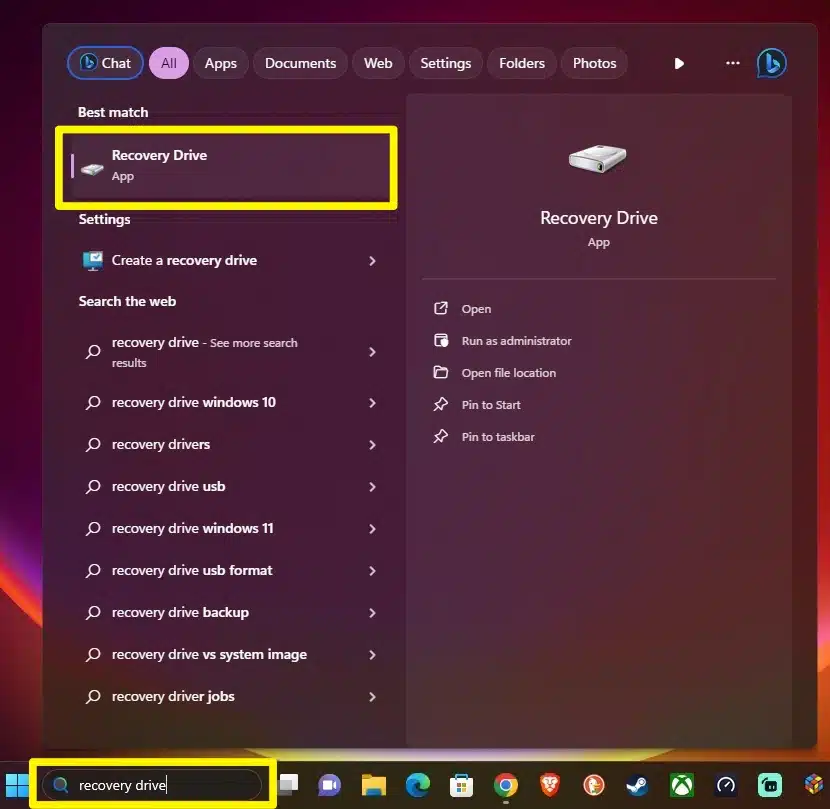
- While running Windows 10, enter “recovery drive” into the desktop search tool and click the “Best match” search result.
- If you see a notice on your screen asking “Do you want to allow this app to make changes to your device?” Click the “Yes” button.
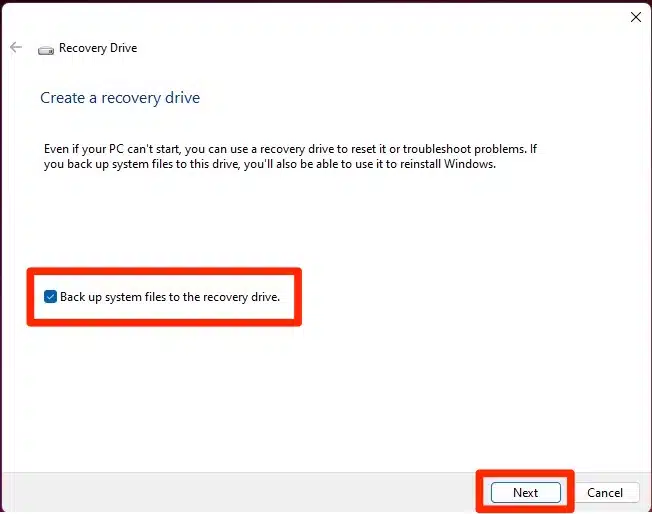
- Windows 10 will open an application with one option, as shown below. Make sure the “Backup system files to the recovery drive” checkbox is checked and then click the “Next” button. Windows will then get to work preparing the files to be written to the USB stick. This could take a few minutes or longer, depending on your computer’s specs.
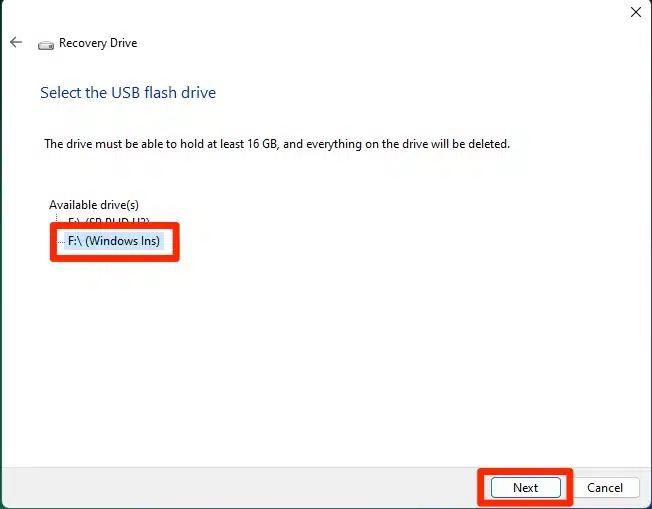
- Once Windows has finished preparing the files, you’ll be prompted to insert a 32GB or larger USB drive or display the available USB drive if you already have a large enough drive connected to your PC.
- Select the USB drive you wish to use as your recovery USB stick and click the “Next” button. The system will warn you that all of the data on the USB stick will be lost and will ask you to confirm that you wish to use the USB stick you’ve selected.
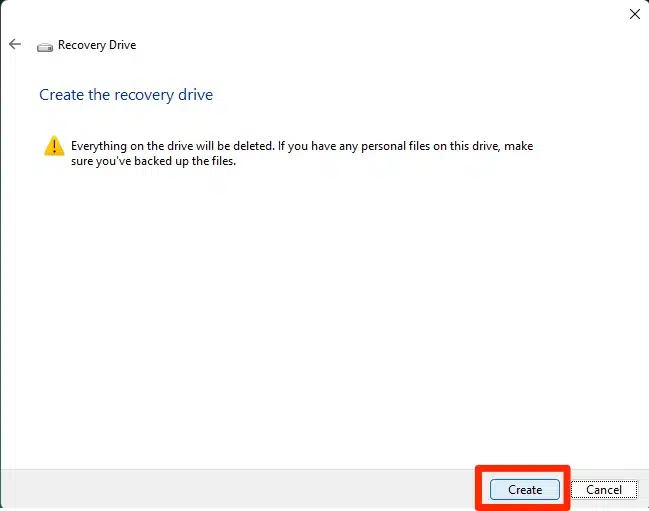
- If everything looks to be how you want it, click the “Create” button. Depending on your computer’s specs, it could take anywhere from a few minutes to an hour or more to complete the process.
Once the process has been completed, you will have a complete Windows 10 USB recovery drive. Store the drive in a safe place, somewhere away from the computer, so the USB stick doesn’t fall victim to the same potential calamities that might befall the PC itself.
If you need to use the Windows 10 USB recovery stick, you’ll need to tell your PC to boot from the USB stick. This can be accomplished by entering the PC’s BIOS settings and changing the boot order to boot from the USB Stick first. The steps for this can vary, depending on the manufacturer of the computer or the motherboard manufacturer. Check your system manual or motherboard manual for more information.
How to Create a USB Recovery Drive For Windows 11
Before beginning, make sure that the USB stick you’ll be using is at least 32GB or larger. Also, you will not be able to use the USB stick for any other purpose. Once committed to being a USB recovery stick, you will not be able to store other files on it, no matter how much “empty” space you may see left on the USB stick.
While you could use a smaller USB stick to create a bootable Windows 11 stick, it will not include recovery of your system files and will only be able to restore your PC to its default configuration, stopping well short of full recovery. So, I strongly suggest you use a 32GB or larger stick.
Once you have your USB stick, do the following:
- While running Windows 11, enter “create a recovery drive” into the desktop search tool and click the “Best match” search result.
- If you see a notice on your screen asking “Do you want to allow this app to make changes to your device?” Click the “Yes” button.
- Windows 11 will open an application with one option, as shown below. Make sure the “Backup system files to the recovery drive” checkbox is checked and then click the “Next” button. Windows will then get to work preparing the files to be written to the USB stick. This could take a few minutes or longer, depending on your computer’s specs.
- Once Windows has finished preparing the files, you’ll be prompted to insert a 32GB or larger USB drive or display the available USB drive if you already have a large enough drive connected to your PC.
- Select the USB drive you wish to use as your recovery USB stick and click the “Next” button. The system will warn you that all of the data on the USB stick will be lost and will ask you to confirm that you wish to use the USB stick you’ve selected.
- If everything looks to be how you want it, click the “Create” button. Depending on your computer’s specs, it could take anywhere from a few minutes to an hour or more to complete the process.
Once the process has been completed, you will have a complete Windows 11 USB recovery drive. You will want to store the drive in a safe place, preferably away from the computer, so the USB stick doesn’t fall victim to the same potential calamities that might befall the PC itself.
If you need to use the Windows 11 USB recovery stick, you’ll need to tell your PC to boot from the USB stick. This can be accomplished by entering the PC’s BIOS settings and changing the boot order to boot from the USB Stick first. The steps for this can vary, depending on the manufacturer of the computer or the motherboard manufacturer. Check your system manual or motherboard manual for more information.
How to Create a USB Recovery Drive for macOS
If your Mac is failing to boot up properly, a bootable macOS USB recovery drive allows you to check your startup drive for errors, get data off of the hard drive, or if there are no mechanical issues with your hard drive, restore data from a Time Machine backup.
You will need a 16GB or larger USB stick, formatted as Mac OS Extended. You will also need a download installer for your version of macOS. The following steps support several versions of macOS, including Sonoma, Ventura, Monterey, Big Sur, Catalina, Mojave, and High Sierra.
- The above links will open the Mac App Store. In the store, once the operating system’s App Store page loads, click the “Get” button, then click the “Download” button in the dialog that appears.

- If the installer macOS installer window opens after macOS has finished downloading, close it by clicking the “Install macOS” menu and clicking “Quit install macOS.”

- With the USB stick still connected to your Mac, go to the “Utilities” folder in your “Applications” folder and open the “Terminal” app.
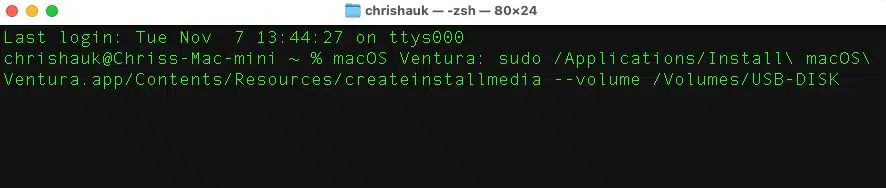
- At the Terminal prompt, type one of the following commands, depending on your version of macOS. Replace the string “My Volume with the volume name of your USB drive.
macOS Sonoma: sudo /Applications/Install\ macOS\ Sonoma.app/Contents/Resources/createinstallmedia –volume /Volumes/MyVolume
macOS Ventura: sudo /Applications/Install\ macOS\ Ventura.app/Contents/Resources/createinstallmedia –volume /Volumes/MyVolume
macOS Monterey: sudo /Applications/Install\ macOS\ Monterey.app/Contents/Resources/createinstallmedia –volume /Volumes/MyVolumemacOS Big Sur: sudo /Applications/Install\ macOS\ Big\ Sur.app/Contents/Resources/createinstallmedia –volume /Volumes/MyVolume
macOS Catalina: sudo /Applications/Install\ macOS\ Catalina.app/Contents/Resources/createinstallmedia –volume /Volumes/MyVolumemacOS Mojave: sudo /Applications/Install\ macOS\ Mojave.app/Contents/Resources/createinstallmedia –volume /Volumes/MyVolume
macOS High Sierra: sudo /Applications/Install\ macOS\ High\ Sierra.app/Contents/Resources/createinstallmedia –volume /Volumes/MyVolume
OS X El Capitan: sudo /Applications/Install\ OS\ X\ El\ Capitan.app/Contents/Resources/createinstallmedia –volume /Volumes/MyVolume –applicationpath /Applications/Install\ OS\ X\ El\ Capitan.app
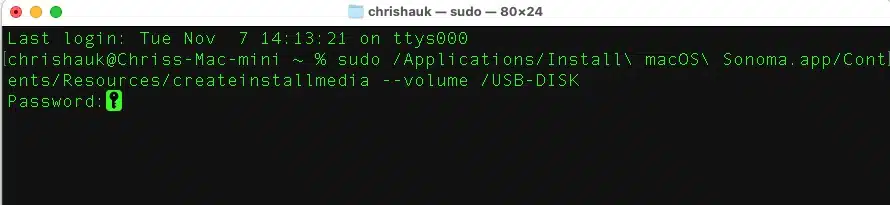
- Press “Return” after you type the command. You’ll be prompted to enter a password. You’ll need to enter the password for the root (Administrator) user on your Mac. If you don’t know the password for the root user, this Apple support page can tell you how to change this password.
- Enter the password and press “Return.” The Terminal window will not display any characters as you enter the password.
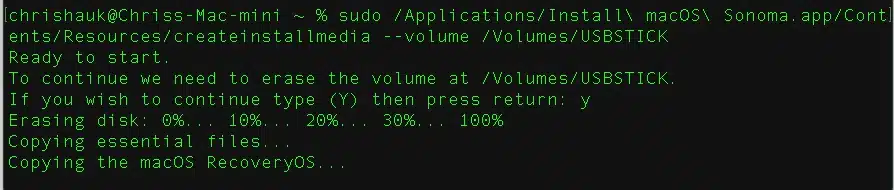
- Terminal will then tell you that it needs to erase the volume. Hit the “Y” key to confirm and press “Return.”
- Terminal will then inform you that the disk is being erased, and will display the progress as it copies the necessary files to the USB stick. This process can take a while, so grab a snack and catch up on an episode of your favorite show.
- Once the copying process completes, Terminal will tell you that it is making the stick bootable.
- Terminal will now tell you that the USB Drive volume now has the same name as the macOS installer version you used, i.e. “Install macOS Sonoma.”
- Close the Terminal app and eject the USB drive by right-clicking the USB stick’s icon and clicking on “Eject” from the menu that pops up or drag and drop the USB stick icon onto the Trash can icon.
Now, if your Mac starts misbehaving at a future date, you can grab the USB Stick from its secure hiding place, put it in your Mac’s USB port and power up the machine while holding the “Option” key down until you see a screen displaying the available bootable volumes on your Mac. Click on the icon for your bootable USB drive, then click the up arrow or press the “Return” key. Your Mac will reboot. Once it has booted, you can reinstall macOS and restore your Mac’s hard drive from one of your Time Machine backups.
How to Create a USB Recovery Drive For Linux
If your Linux-powered PC starts misbehaving, you’ll need a USB recovery stick to rescue your data. In this section, We’ll walk through the steps to create a USB recovery stick by using Rufus and SystemRescue, which is a Linux-based rescue toolkit for administering and repairing Windows and Linux-based systems.
Create a Recovery USB Stick Using Windows
-
- Download the latest version of the SystemRescue image from the SystemRescue download page.
- Download and install a Rufus (Reliable USB Formatting Utility with Source) on Windows.
- Insert a USB stick into a USB port on your Windows PC.
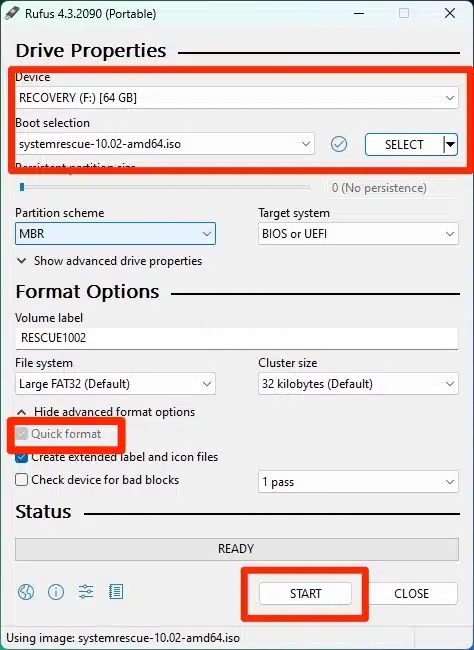
- Run the Rufus app.
- Select the USB drive, then select the downloaded SystemRescue image. Click the “Quick format” checkbox to speedup the bootable USB creation process and click on “START.”
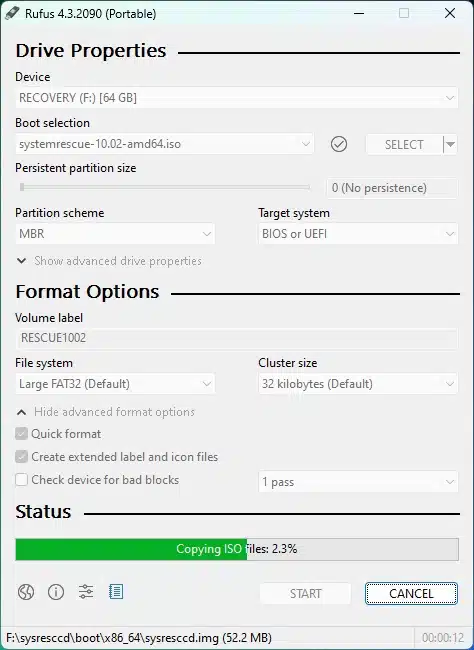
- During preparation, you may be asked to answer a couple of questions. Keep the recommended options.
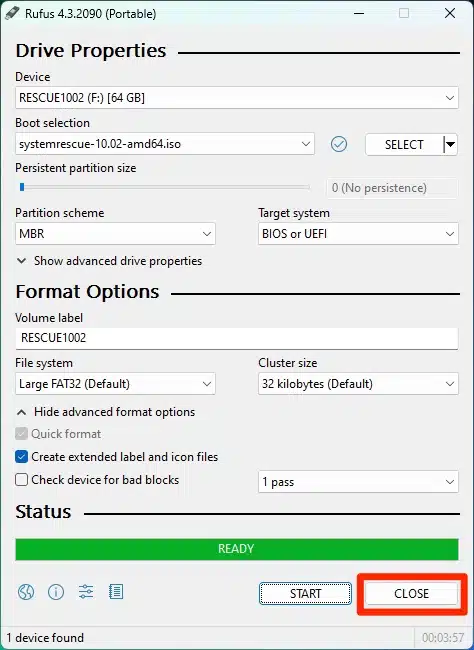
- When the status changes to “READY” close the Rufus app and eject the USB stick.
Create a Recovery USB Stick Using Linux
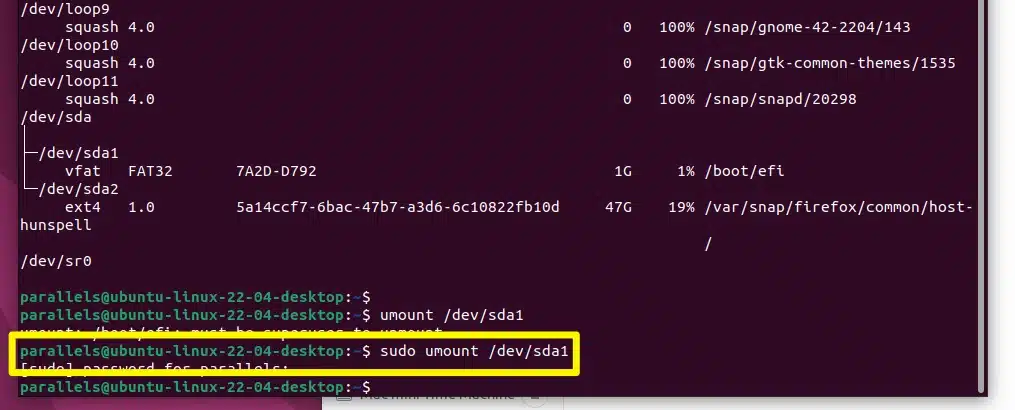
- Plug in your USB stick and run the “lsblk” command to identify the USB device name:“$ lsblk -fp”
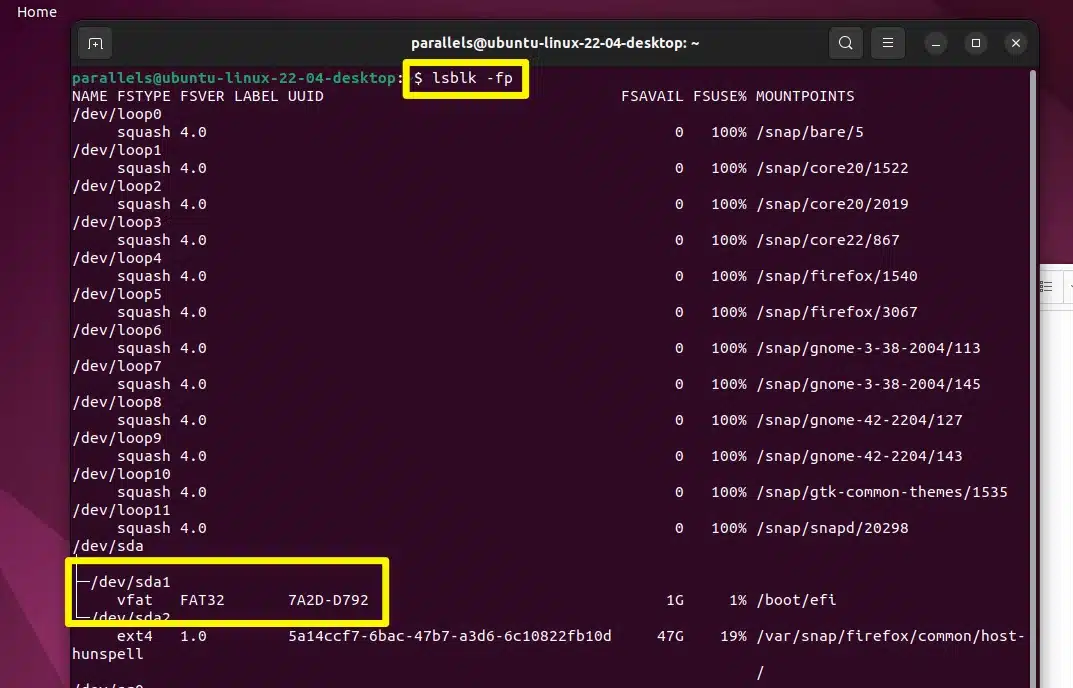
- In this example, Linux showed that “/dev/sda1” is the USB device name.
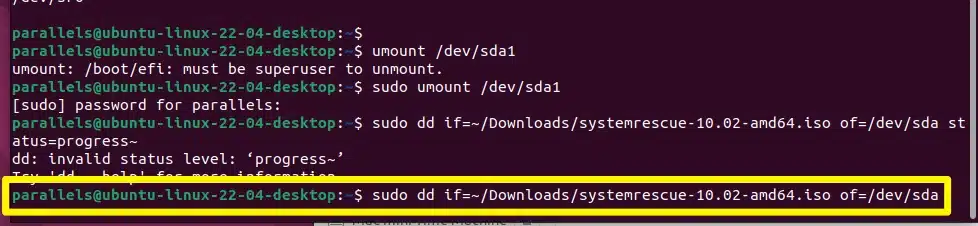
- Umount the USB stick with the following command: “$ sudo umount /dev/sda1” You may have to enter the admin password for Linux.
- Copy the SystemRescue image to the USB stick (depending on your system’s specs, this may take up to five minutes or longer):“$ sudo dd if=<systemrescue_iso> of=<usb_device_name> status=progress”In this case, the command should look like this:“$ sudo dd if=~/Downloads/systemrescue-10.02-amd64.iso of=/dev/sda status=progress”
- Once the recovery USB stick has been created, remove the USB stick and store it in a secure place.
Boot From the Linux Rescue USB Stick
- Insert the Linux Rescue USB Stick into the computer that needs to be repaired.
- Power on the computer and enter the BIOS settings.(Common keys used to enter the BIOS are F1, F2, F10, Delete or Esc.
- Search for the “Boot Order” settings.
- Set the Linux Rescue USB Stick at the top of the “Boot Order” list.
- Save and exit.
- After booting from the Linux Rescue USB Stick, you’ll see a standard Linux shell prompt.
- If you prefer use a GUI (Graphical User Interface), run: “$ startx”
A list of the most important data recovery and system repair tools you’ll find on the Linux Rescue USB Stick you created can be found here.
Conclusion
Remember, it is not a question of IF your Windows, Linux, or Mac computer will experience a hard drive crash or other failure, it is a question of WHEN it will fail. Having a rescue USB stick handy for your computer’s operating system will allow you to recover much quicker than being required to start over from scratch. Also, be sure to create backups of your data on a regular basis. That will allow you to quickly restore your files and get back to work or play much sooner.