
Do you want to know something about Google?
Google knows everything about you.
Google knows you better than you realize, and perhaps even better than you know yourself.
Think about it: Google knows when you searched for an illness you’re dealing with; a colleague you looked up; where you booked a hotel or looked for a hotel; searched for a new car – the list goes on and on.
Google uses all the search data of every account to create a user profile. A user profile contains your age, gender, country of origin, and residence, as well as all of your interests, languages, search history, and much more.
You can read more about all of your data that Google is tracking.
To make it even worse, Google has stored all the search data and activities from all of its users (worldwide!) in databases since 2005!
Imagine that: Google knows what you searched for 13 years ago. That is a pretty serious threat to your online privacy if you ask me.
While most of us know how to erase our browser history in Chrome or Firefox, that doesn’t permanently erase Google’s storage of it.
When you decide to clear out your browser history, you’re merely deleting all the search history that is saved on your own PC. That means that clearing your browser history does not delete any of your data stored on Google’s servers.
In this step-by-step guide, I will show you how to permanently delete your entire Google search history in order to restore your online privacy. Search and browsing data will haunt you no longer. Unlike deleting browser history, following this guide will allow you to permanently delete all of your data.
Why Is Google Saving All User Data?
Google has probably been able to build quite a profile on you since 2005.
Your private information is Google’s golden key to success. And every time you use an additional Google product, you provide Google with even more data.
So, what does Google do with all that data?
It’s pretty simple. Google uses this data for three purposes:
- Firstly, Google uses customer data to absolutely own the advertising industry.
- Secondly, Google partners up with governments and helps them to gather data and conduct mass surveillance.
- Thirdly, Google uses the data to grow newly acquired businesses under the Google banner. For a complete list of acquired businesses owned by Google, visit this page.
Google Account Is Required to Delete Data
Google uses cookies to track every user on all of its platforms. And it doesn’t stop there. Google also creates a log file every time you browse on Google.
A log file typically saves your IP address, what operating system or device is being used, what browser you’re using, as well as the date, time, and language of your search query (and the query itself, of course).
You really need to have a Google account in order to delete your data, and deleting it without a Google account is beyond the scope of this article.
In the next section, I’ll show you how to delete this data in your Google account permanently via the “My Activity” tool.
What Is Google’s “My Activity” Tool?
Within your Google account settings, there is a tool called “My Activity.” In this tool, you can see all your search data and online activity. Here, you can edit your account settings or delete the stored data.
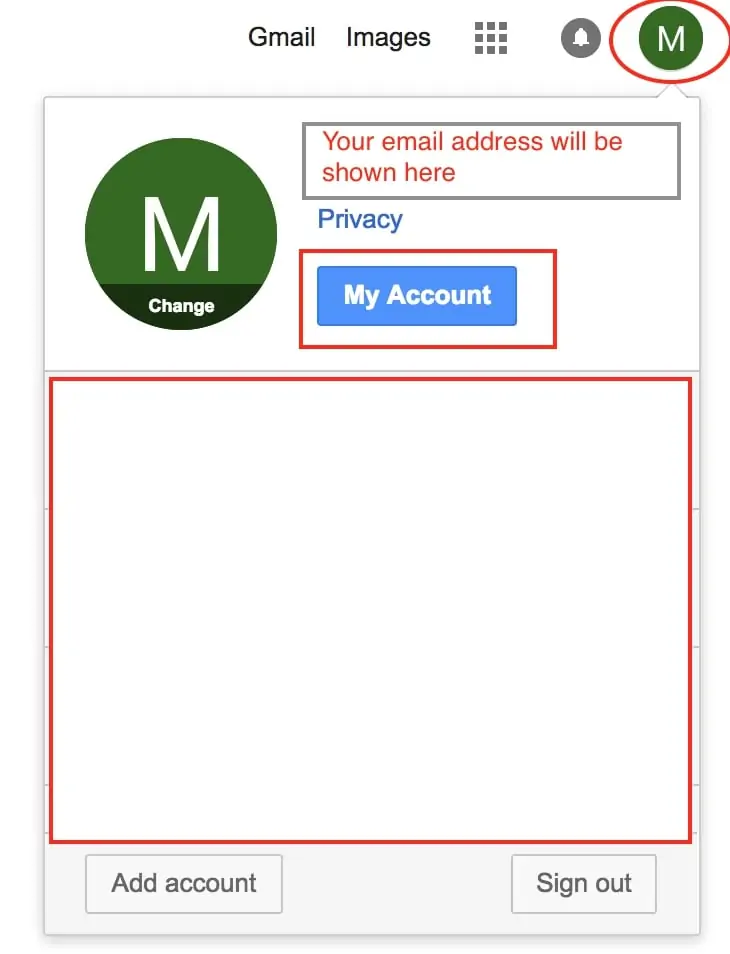
In order to enter the “My Activity” dashboard, simply go to Google’s homepage and go to the upper-right corner. When you’re logged into your Google account, click on the circled icon with your initial.

From the drop-down menu, select “My Account.” Obviously, I covered up my email accounts with a white layover to protect my own privacy.
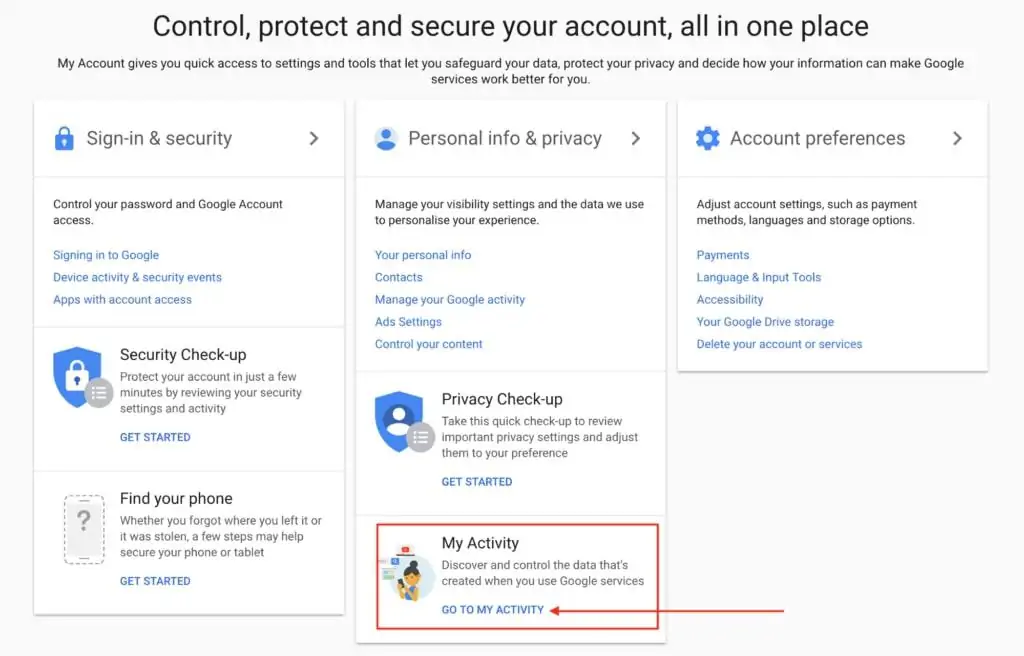
On the next page, find the “My Activity” section and click on “Go to My Activity.” Check out the example below:
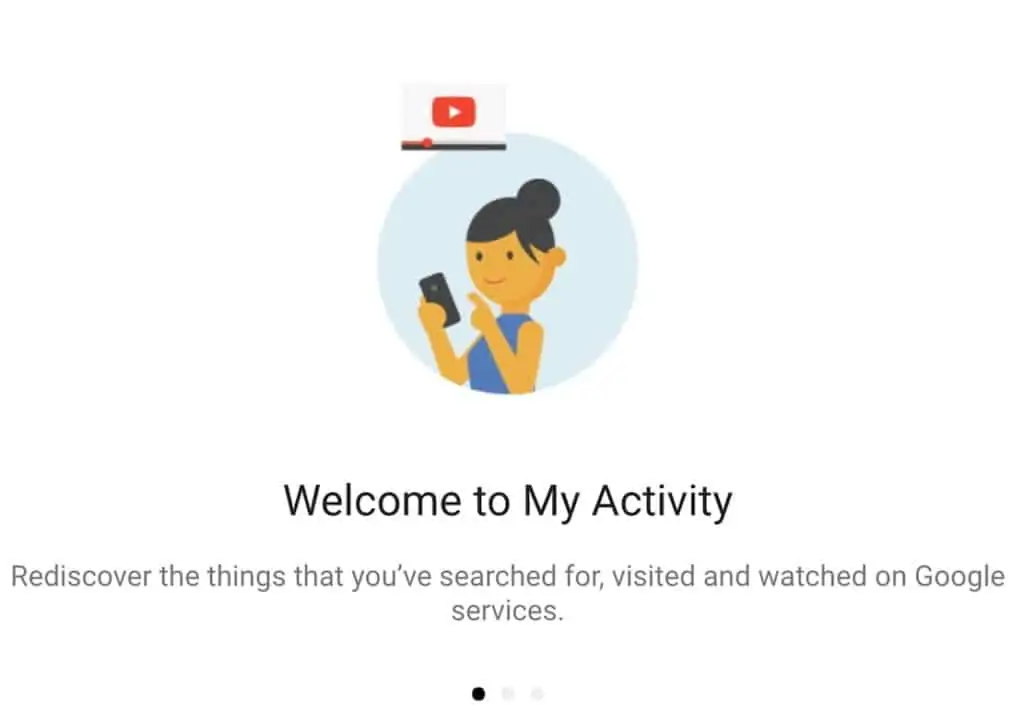
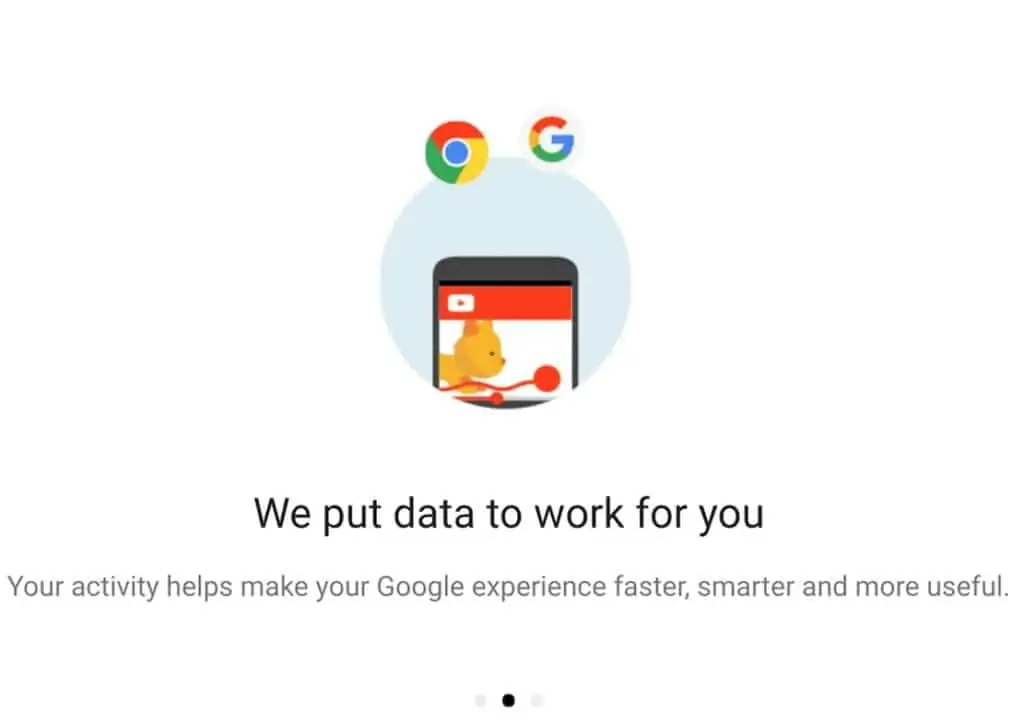
You will then see three promotional slides with reasons why you should share data. We will ignore them since we want to accomplish the exact opposite.
At this point, you are inside of Google’s My Activity dashboard, so let’s get to work!
Download Data You Want to Keep
Of course, this guide is about erasing your entire Google history, but I want to show you how you can download particular items that you might want to keep.
It goes without saying that this should be done before you delete all the data. Note: you can’t restore any deleted files.
I recommend that you delete as much as you can. Of course, you want to keep your most important emails, so download these and delete everything else.
Follow the next steps to save important data:
- Log in to your Google account.
- Visit Google’s data takeout page.
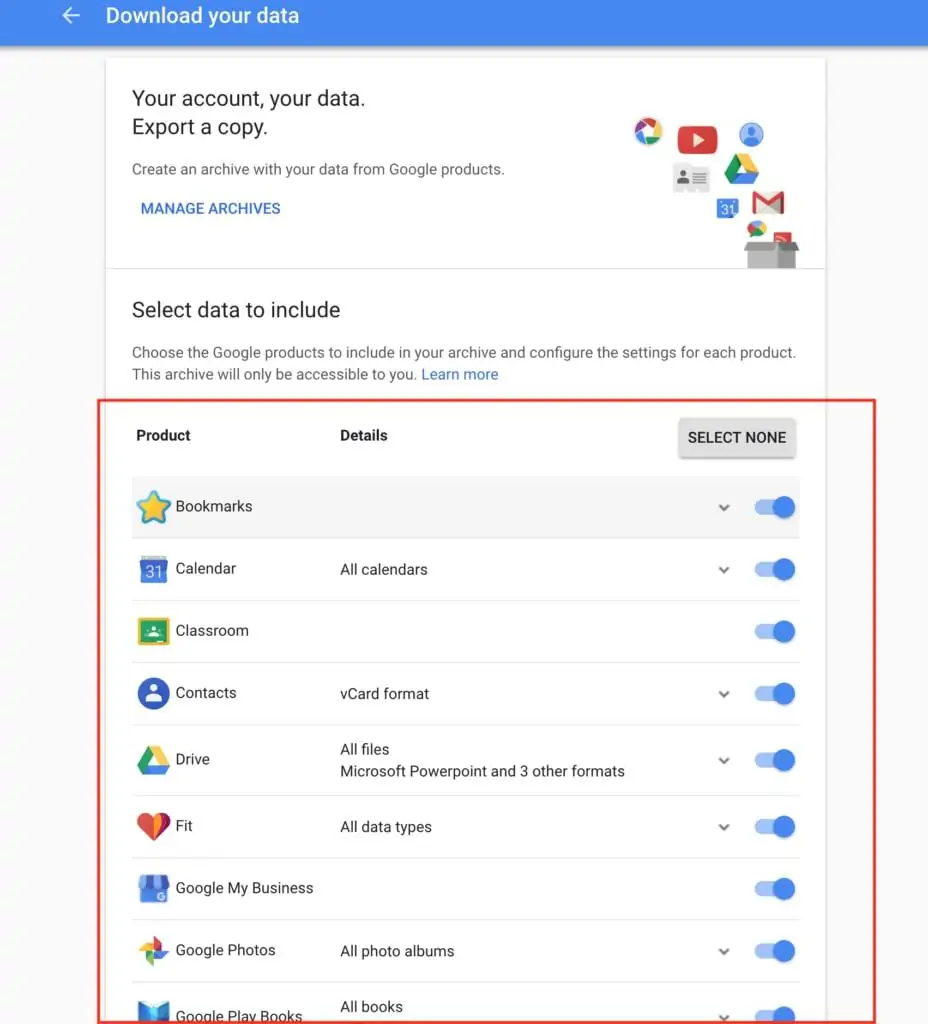
3. By default settings, all the data is selected to be downloaded. So, simply click “Select None” on the top right to uncheck all the boxes.
4. The next step is to check the items you want to download. For example, I checked the Gmail box. By clicking on the little drop-down arrow, you can further customize the download settings.
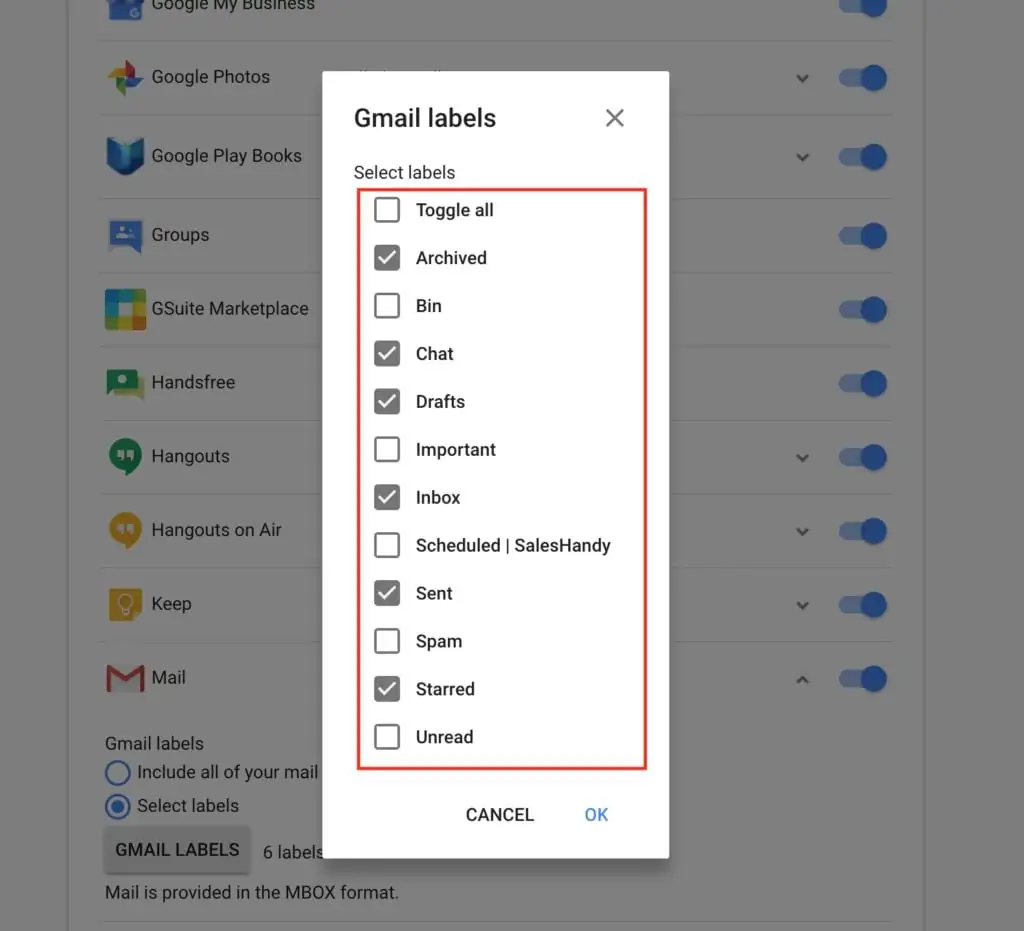
You can choose to drag all your important emails to a specific folder and only tick the box of that folder in this customization option. All other emails will not be saved.
5. Once you’ve made a selection of items you want to download, scroll down and click “Next.”

6. On the next page, you can customize the download settings and location where it will be stored.
7. Select the file type. You can choose between .zip or .tgz. The archive size ranges from 1GB to 50GB.
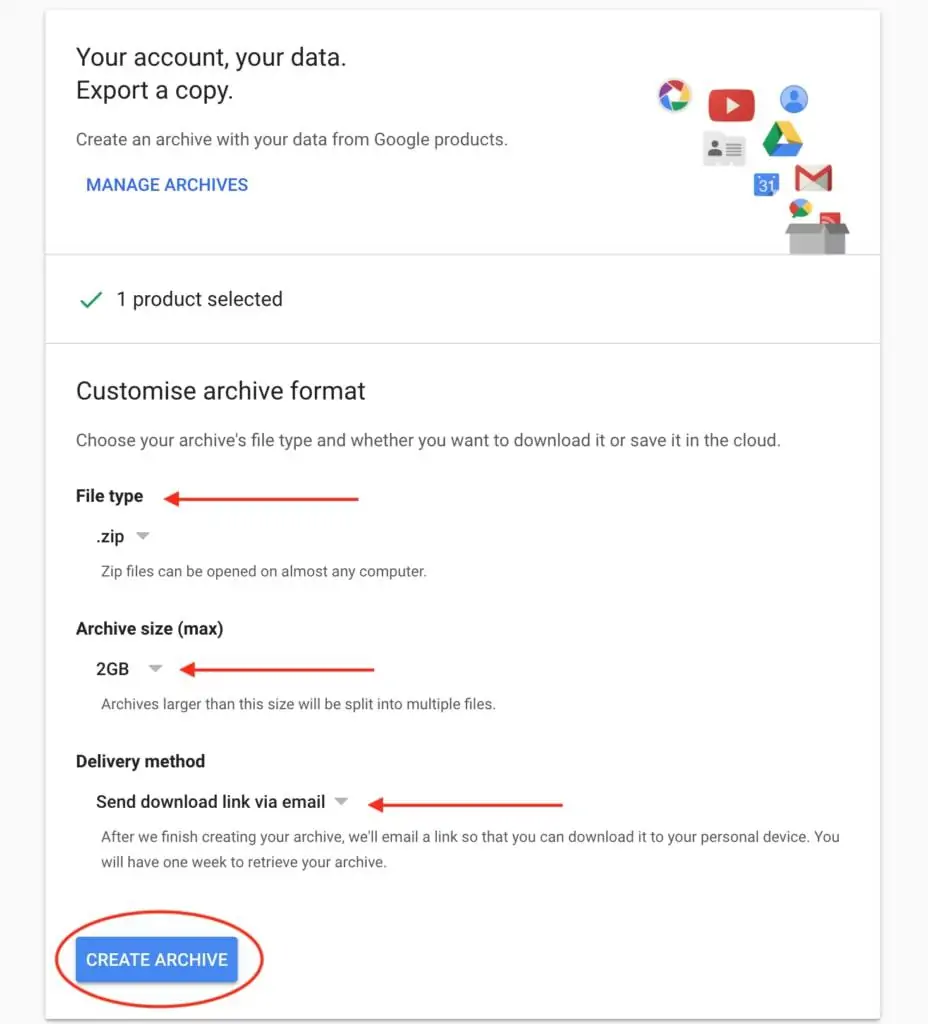
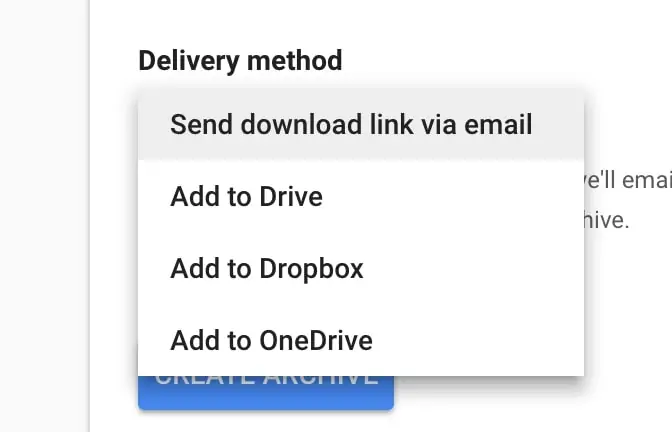
8. The last option is to select the delivery method. I recommend sending a download link via email, but you can also choose to upload it to one of the cloud storage options.
9. One of the last steps is to click “Create Archive” to download your data. This process can take up a few minutes, so be patient!
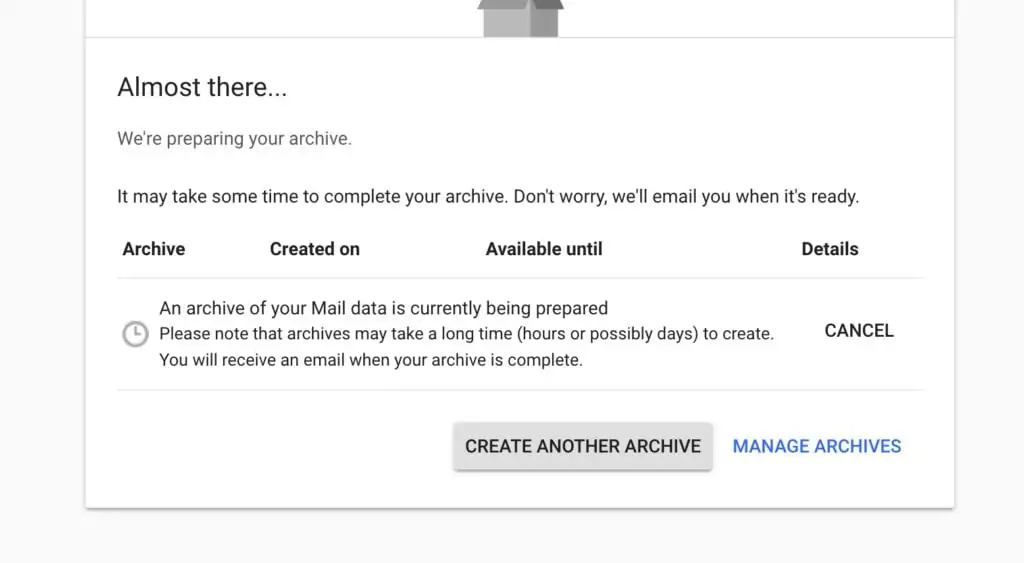
10. You will receive an email from Google with a download link to your archived data. Click “Download archive” to start the process. I recommend downloading one file to your PC and then creating a copy on an external storage device or in cloud storage.

Now, let’s begin with the process of erasing all your history from Google. Follow all steps below!
Delete Your Search Data From Google’s History
Since you have downloaded the most important files you want to keep, it’s now time to start the process of erasing your Google search history.
Similar to the previous steps, the process is pretty simple. Let’s start by logging into Google’s My Activity dashboard.
To delete all your data from Google’s servers, follow the next steps:
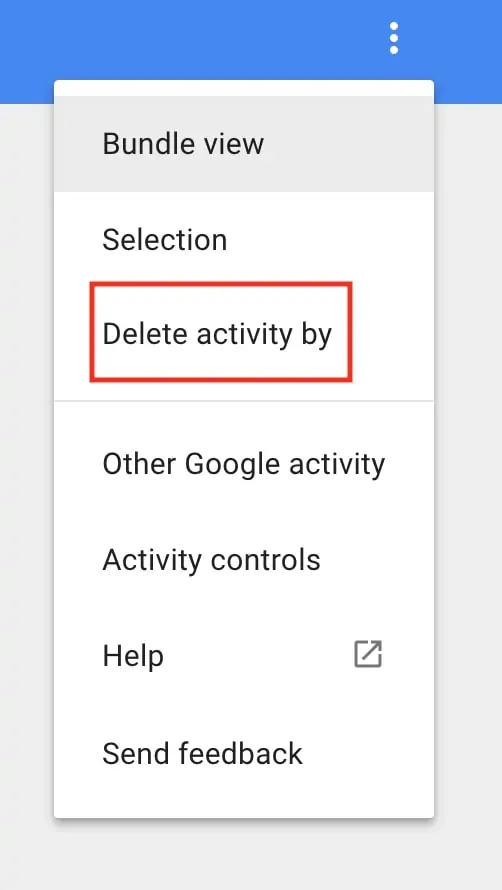
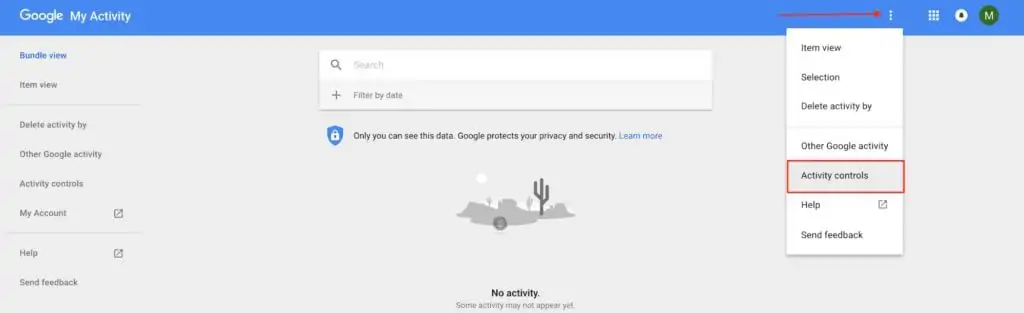
- At the top-right corner within the My Activity dashboard, click on the triple-dotted vertical line.

2. In the drop-down menu, click “Delete activity by”.
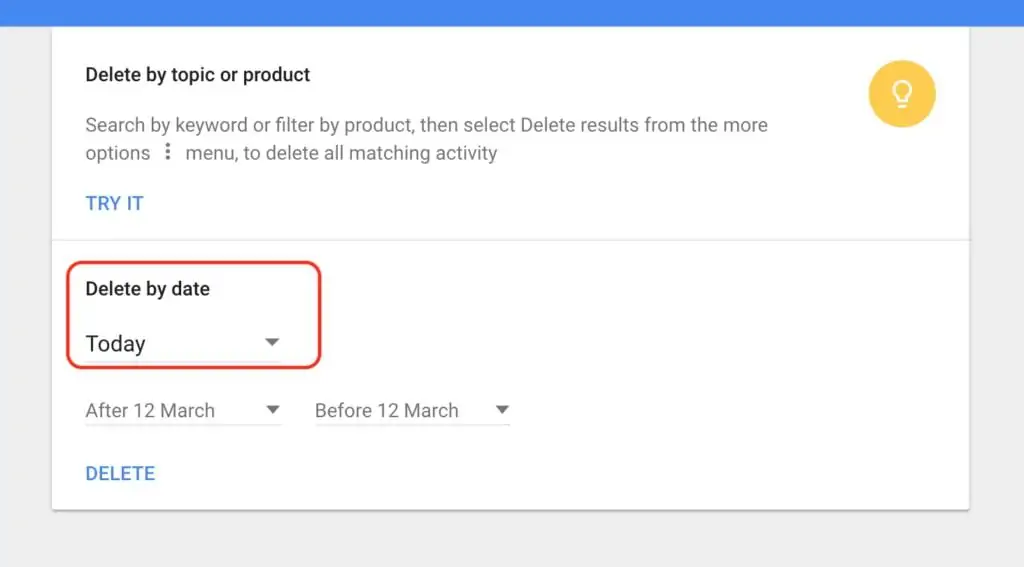
3. You will be redirected to a page with options to delete by topic or product. This means that you can delete certain activities from Google’s database.
4. If you click on “Try It,” you will return to the main dashboard of My Activity. To delete a specific activity, click on the triple dotted vertical line and click “Delete.”
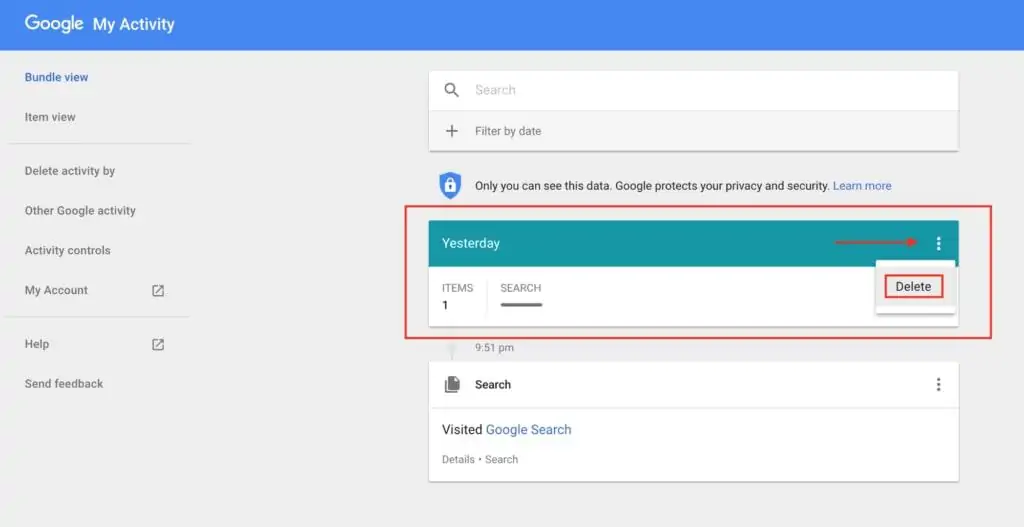
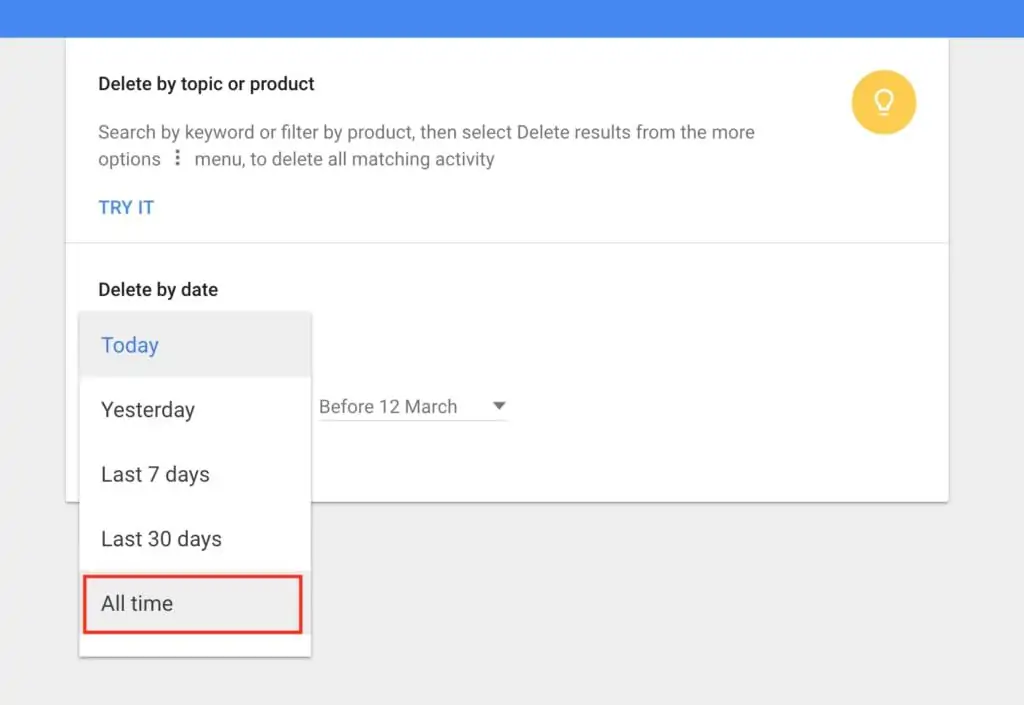
5. Click the small arrow to open the drop-down menu to select a date range. I highly recommend selecting “All time” to delete everything. If you select “All time,” all the search data and activities of your account will be deleted from its archive.
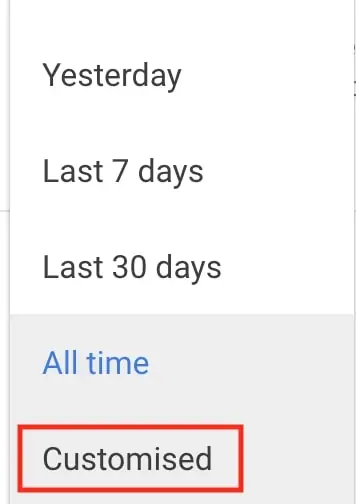
Note: you can also select the option “Customized” and you can enter a manual date range.
6. Now, press “Delete” – you will see a pop-up to confirm if you really want to permanently delete your “all-time” search history.
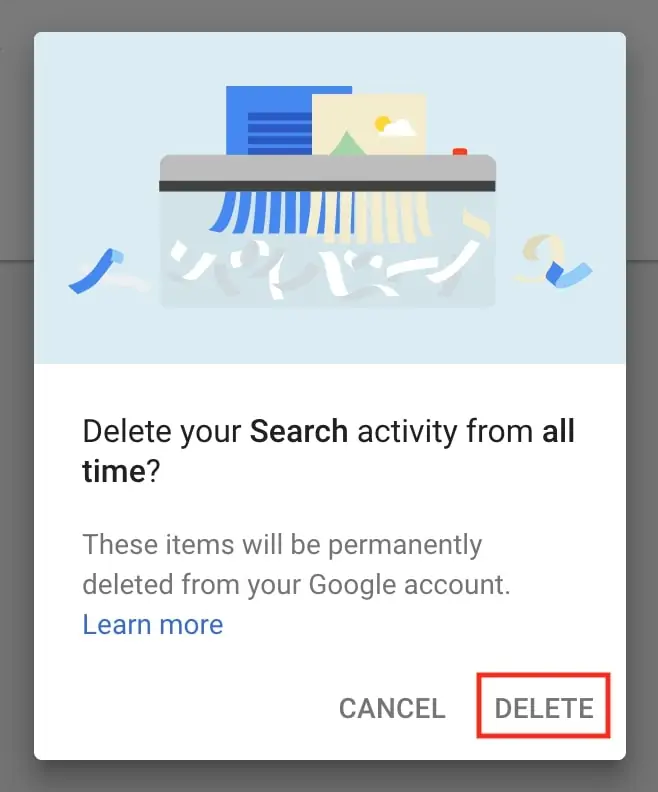
7. Tap “Delete” again to confirm that you want to delete everything.
That’s it!
You have just deleted your entire Google search history.
At this point, you have two options:
- Repeat this process every few months.
- Prevent Google from tracking your activities by changing your account settings.
I recommend adjusting your account’s activity settings, so you won’t have to repeat the same process again.
How to Disable Google From Tracking My Activity
After completing the process of deleting all your data, it’s important to disable all activity tracking.
Follow the next steps to change the activity tracking settings.
- Go to your My Activity dashboard.
- Again, go over to the top-right corner and click on the triple-dotted vertical line to expand the menu.
By default, Google is tracking every data point in order to collect as much data as they can.

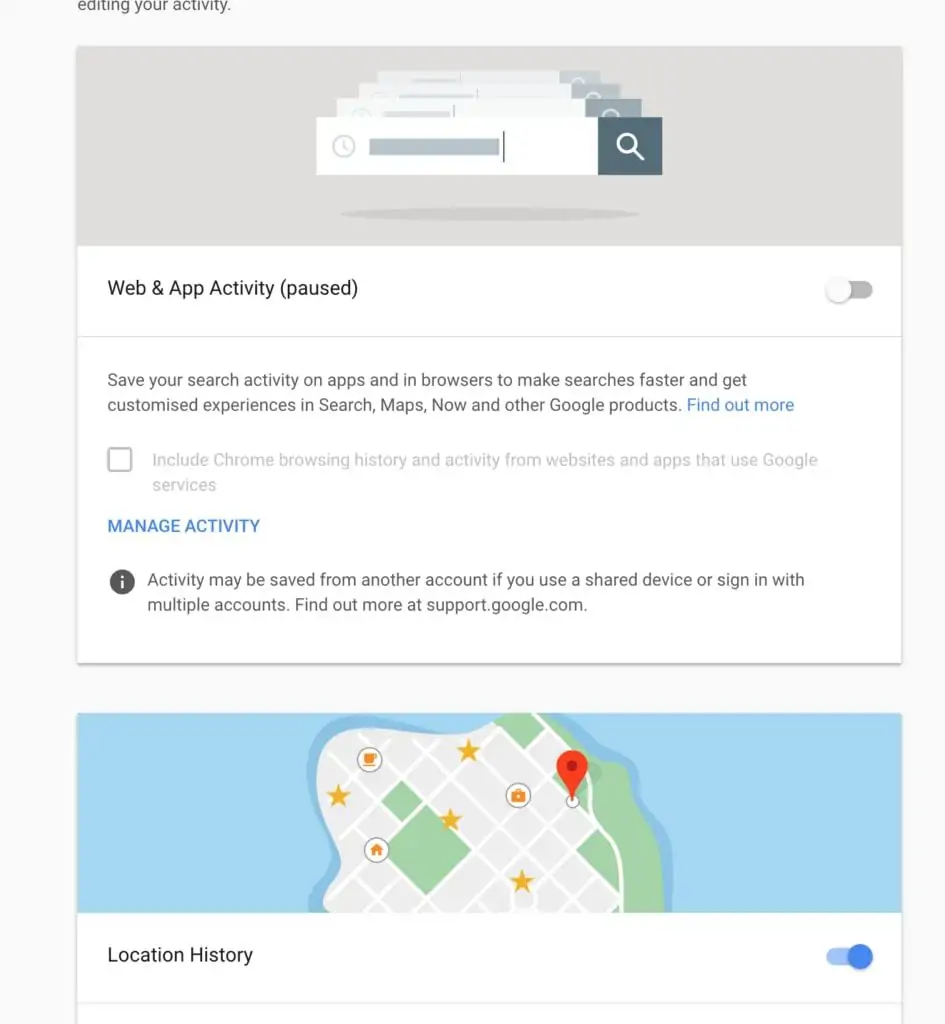
3. Disable every activity-tracking option by de-selecting the blue switch located on the right. When you turn off Web & App Activity, you will get the following pop-up:

Read the information and then tap “Pause” at the bottom.
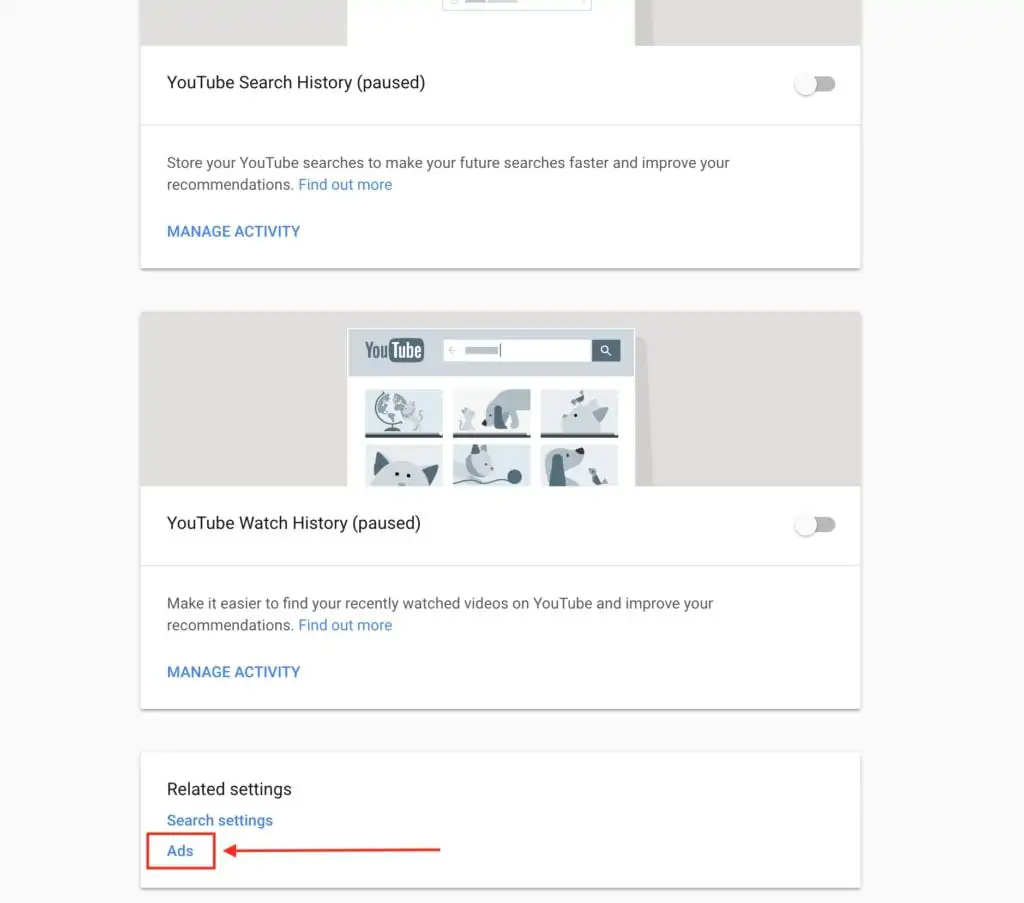
4. Done correctly, the background and switch will turn gray. Repeat this process for all of the activities.
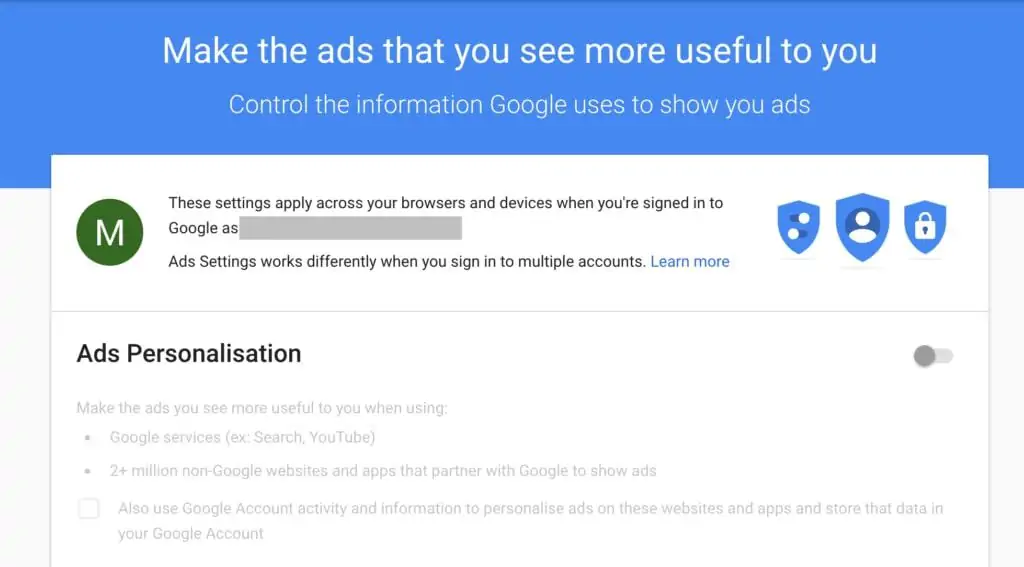
5. Of course, Google has a hidden option for extra privacy settings and personalized advertisements. Scroll down on the page and tap “Ads” located at the very bottom of the page.
6. On the next page, follow the same instructions as before. De-select the blue switch on the right side.

Note: your Google account will be shown where you see the gray bar.
7. Tap “Turn Off” in the pop-up to stop the personalization of ads
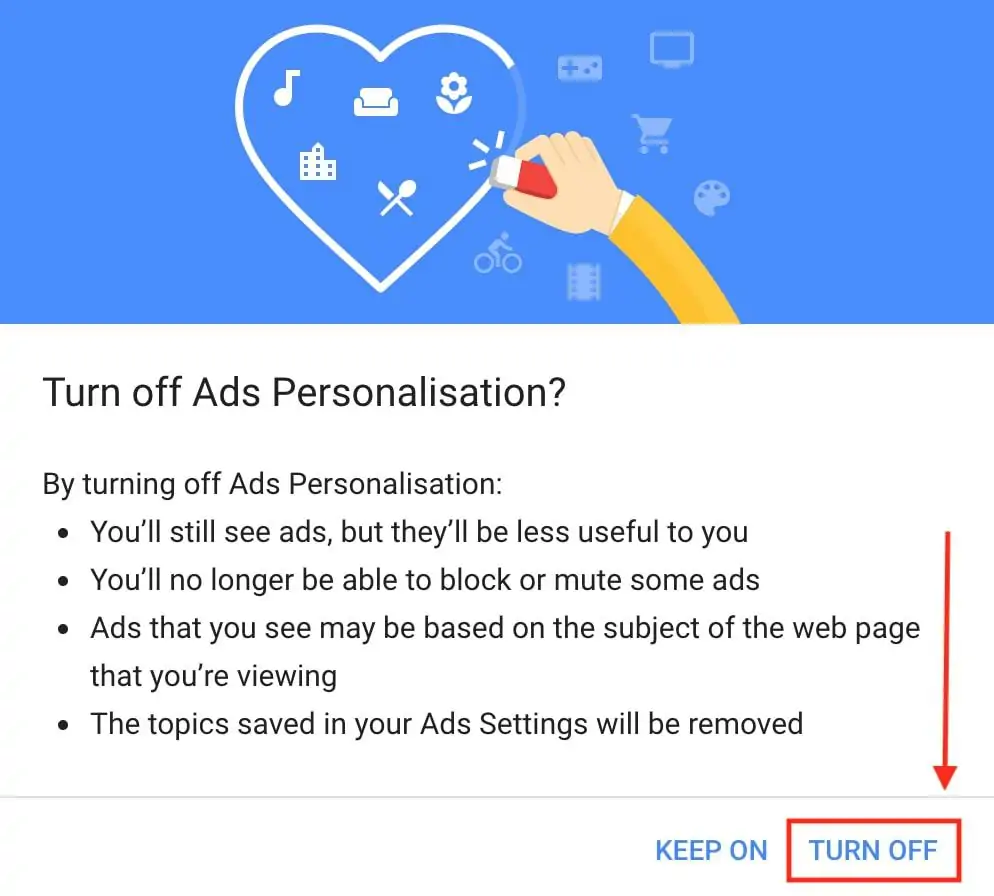
8. You will see another pop-up confirming the fact that you’ve turned it off successfully.
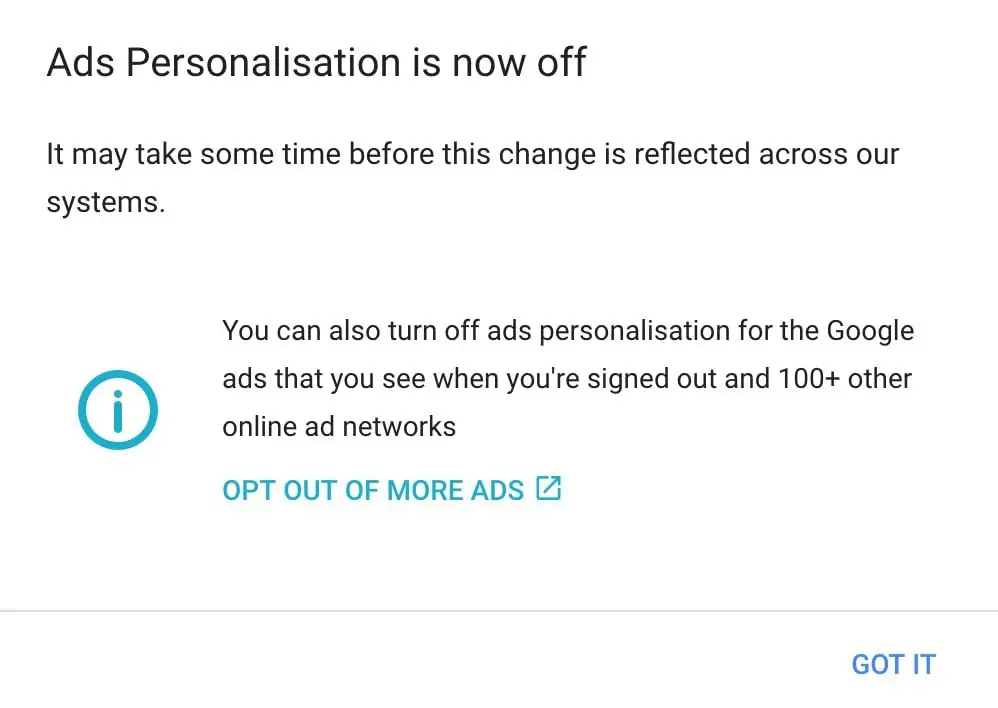
Similar to the other activity options, the section will turn gray.
That’s it! You’re done.
You’ve successfully disabled Google from tracking any of your online activities.
Saying Your Final Goodbye to Google’s Database
The steps I’ve shown you in this article will be your key to restore your online privacy and internet activities. No more of Google’s prying eyes looking into your search history. No more personalized ads by companies using Google’s data to find you.
Google won’t be able to see what your daily planning looks like in Google Calendar any longer, or what photos you’ve stored in Google Photos. Google won’t be able to see when you send out emails, to whom, and what you write.
Just as a reminder, if you don’t want to repeat this process every few months, make sure to adjust your privacy settings and disallow Google from tracking and saving any of your data in the future.
For now, enjoy the feeling of knowing Google won’t know everything about you anymore!
Erasing Your Entire Google History FAQs
Does Google Really Delete Your Data?
You can find and delete your activity in "My Activity," and you can stop Google from saving most activity at any time. However, your data will still be stored in Google's server backups, at least for a short period of time.
What Happens if I Clear All Google Data?
If you clear your Google data, your search results will not be as personalized as they were before deleting the data. However, on the bright side, Google no longer has any data on your previous online travels.
Should I Clear My History in My Browser?
Yes, doing this ensures that if someone gets hold of your computer that they cannot view your browser activity. In Google Chrome, go to "Settings," click on "Privacy and Security," and click on "Clear browsing data." Here, you can clear your browsing history, cookies and other site data, and cached images and files.
Why Does Google Store My Usage History?
Mainly because the most important product Google sells is you. Or to be more specific, they sell information about you and your online travels. Your usage history is saved in your browser, as well as on its own servers. (Where that information can remain forever unless you take action.)
Contents [hide]
- Why Is Google Saving All User Data?
- Google Account Is Required to Delete Data
- What Is Google’s “My Activity” Tool?
- Download Data You Want to Keep
- Delete Your Search Data From Google’s History
- How to Disable Google From Tracking My Activity
- Saying Your Final Goodbye to Google’s Database
- Erasing Your Entire Google History FAQs
- Does Google Really Delete Your Data?
- What Happens if I Clear All Google Data?
- Should I Clear My History in My Browser?
- Why Does Google Store My Usage History?